Manage Your CCA OneCard Online
Incoming students - In order to create your CCA OneCard card which will be used for room access, meal purchases, and campus access, you must upload a photo by following the directions below.
Incoming Students - Please upload your photo by August 15 (Fall term) and by January 1 (Spring term) to ensure a smooth check-in process to CCA Residence Halls.
Set Your ID Photo in TouchNet OneWeb
1. Log in to TouchNet OneWeb using your CCA credentials.
2. Your current CCA OneCard photo (if you have one) will display on the home page (the Accounts > Personal Information).
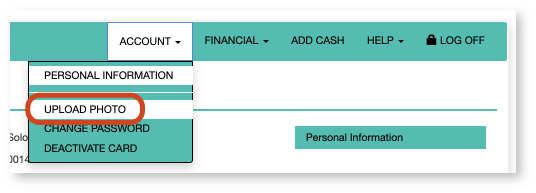
3. Click the Account tab, then select Upload Photo (your photo must be in JPEG format only!)
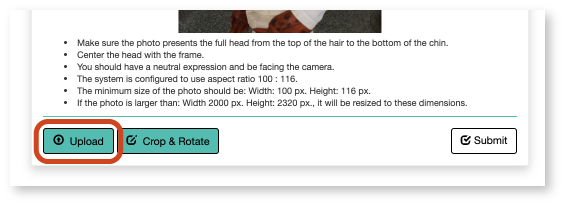
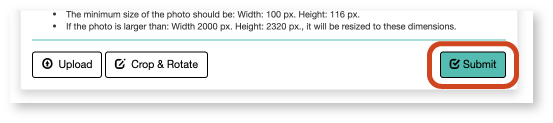
4. Read the listed ID photo requirements.

5. Click Upload, then select a file from your computer.
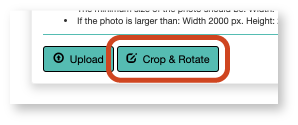
6. Click Crop & Rotate to adjust the photo frame.
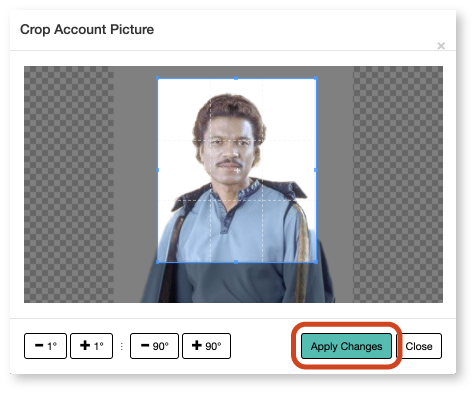
- Click and drag the box overlaying the photo to change the crop.
- Click +/- angle buttons to adjust the photo orientation.
- Click Apply Changes when finished.
7. Click Submit when you’re ready to complete your photo upload.
- You’ll see a green confirmation banner when you’ve successfully added your photo.
Newly-submitted CCA OneCard photos are routed to Public Safety for approval. Your new photo will not be visible in OneWeb until approvals have been processed.
Lost or Stolen Card?
You can deactivate your ID in OneWeb in the event that it is lost or stolen.
- Log in to TouchNet OneWeb using your CCA credentials.
- Click the Account tab, then select Deactivate Card.
- This will immediately mark your card as inactive. Visit Public Safety to be issued a new card or to reactivate your card if found or recovered.